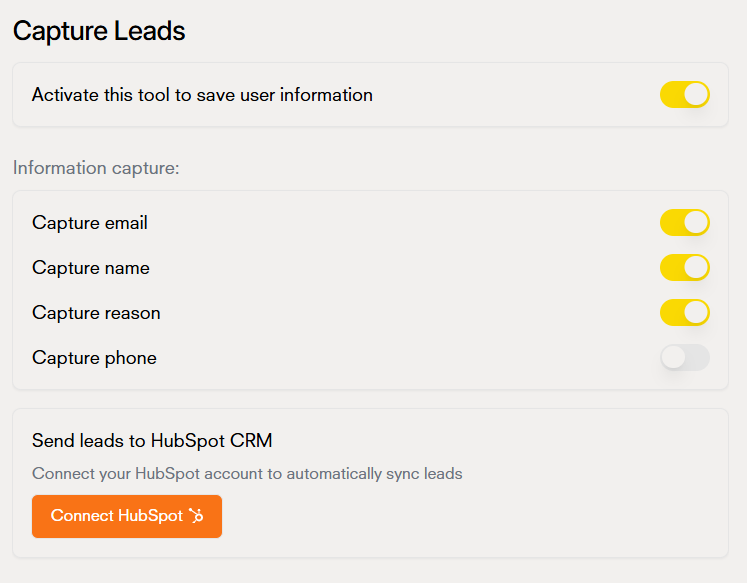
Lead Generation
Configure your chatbot to collect valuable lead information during conversations. This will allow the chatbot to remember valuable user data to enhance the user experience.Customizable Fields
- Contact Information
- Motive (schedule appointment, support ticket, etc.)
- Phone Number
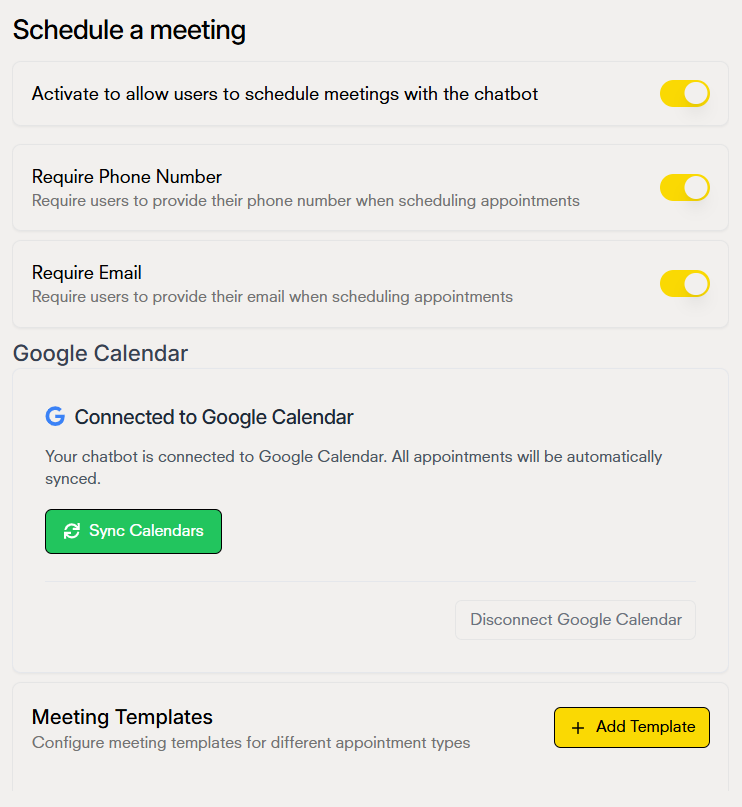
Appointment Scheduling
Allow users to schedule appointments directly through your chatbot.Main Features
- Schedule availability
- Confirmation emails
- Confirmation messages
- Timezone handling
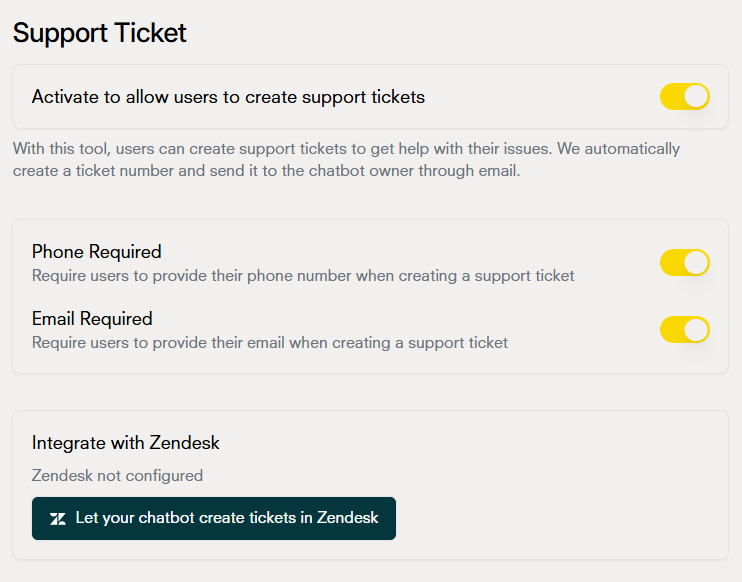
Support Tickets
Enhance customer support efficiency by automatically creating, organizing, and tracking support tickets, ensuring faster issue resolution, better communication, and improved customer satisfaction.Main Features
- Automatic ticket creation
- Priority assignment
- Category classification
- Status tracking
- Team assignment
- Resolution tracking
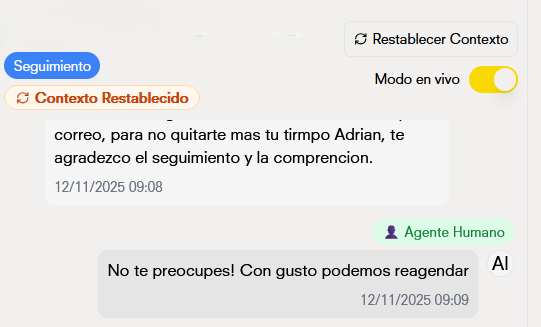
Live Chat
Take control of conversations when needed with the live chat feature. The tool allows the chatbot administrator to take control of the conversation so that a human agent can answer the user’s questions or concerns.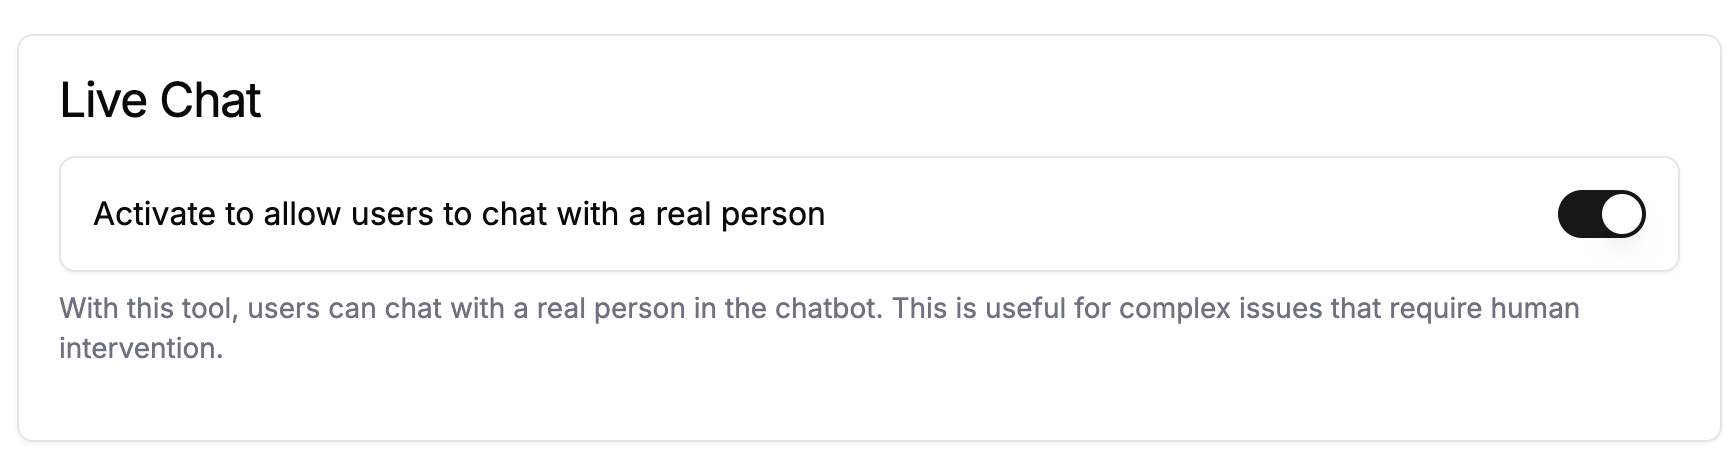
Main Features
- Seamless AI to human handoff
- Real-time conversation monitoring
- Chat history access
- User information display
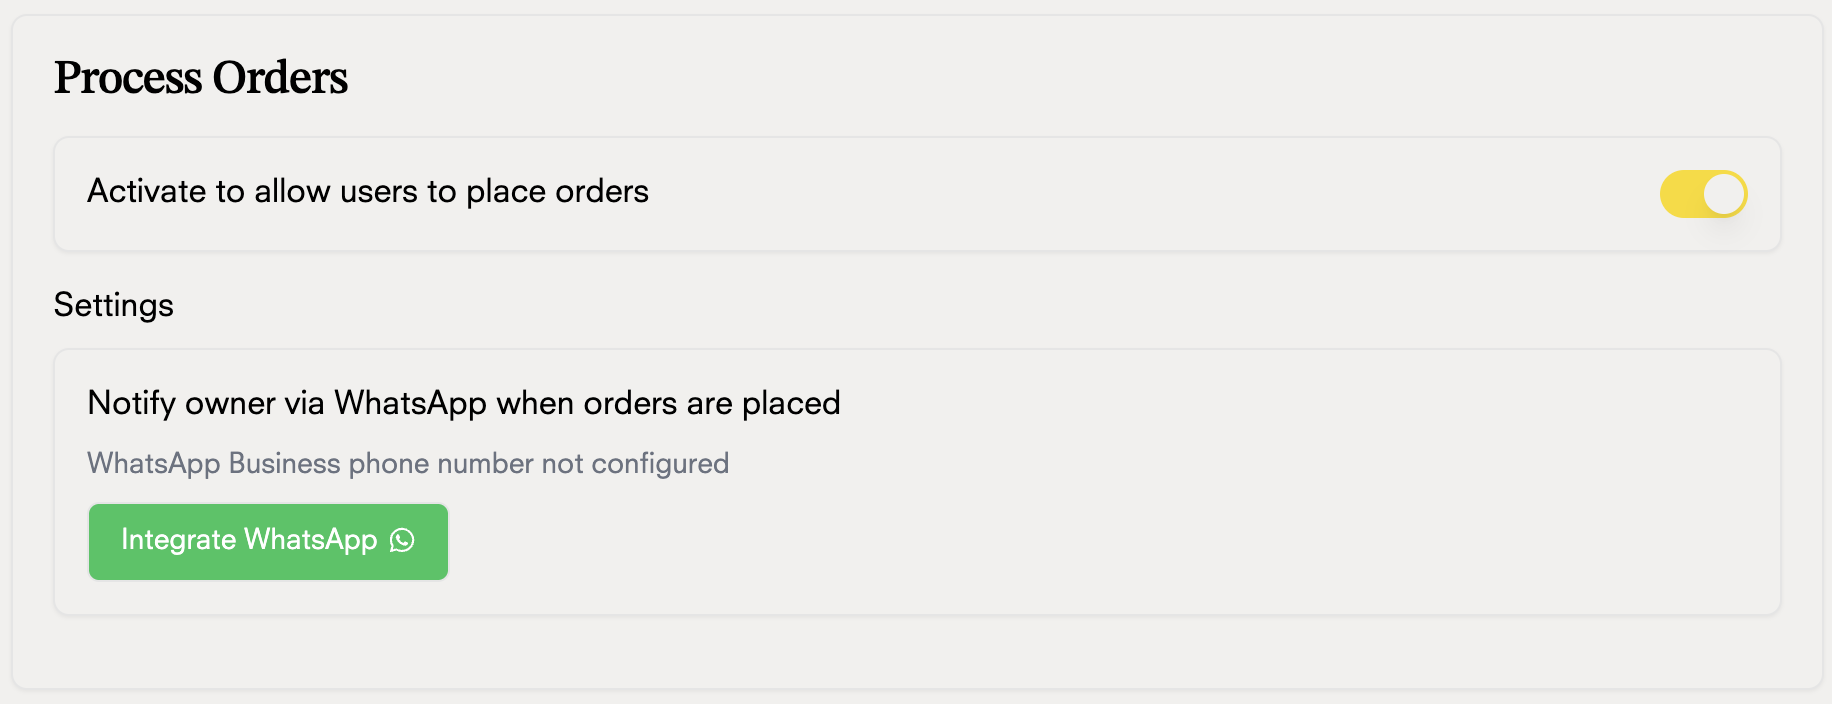
Process Orders
Let your chatbot take orders for you, quantity, customer data, type of payment, etc.Main Features
- Order quantity management
- Customer data collection
- Payment type selection
- Order confirmation notifications
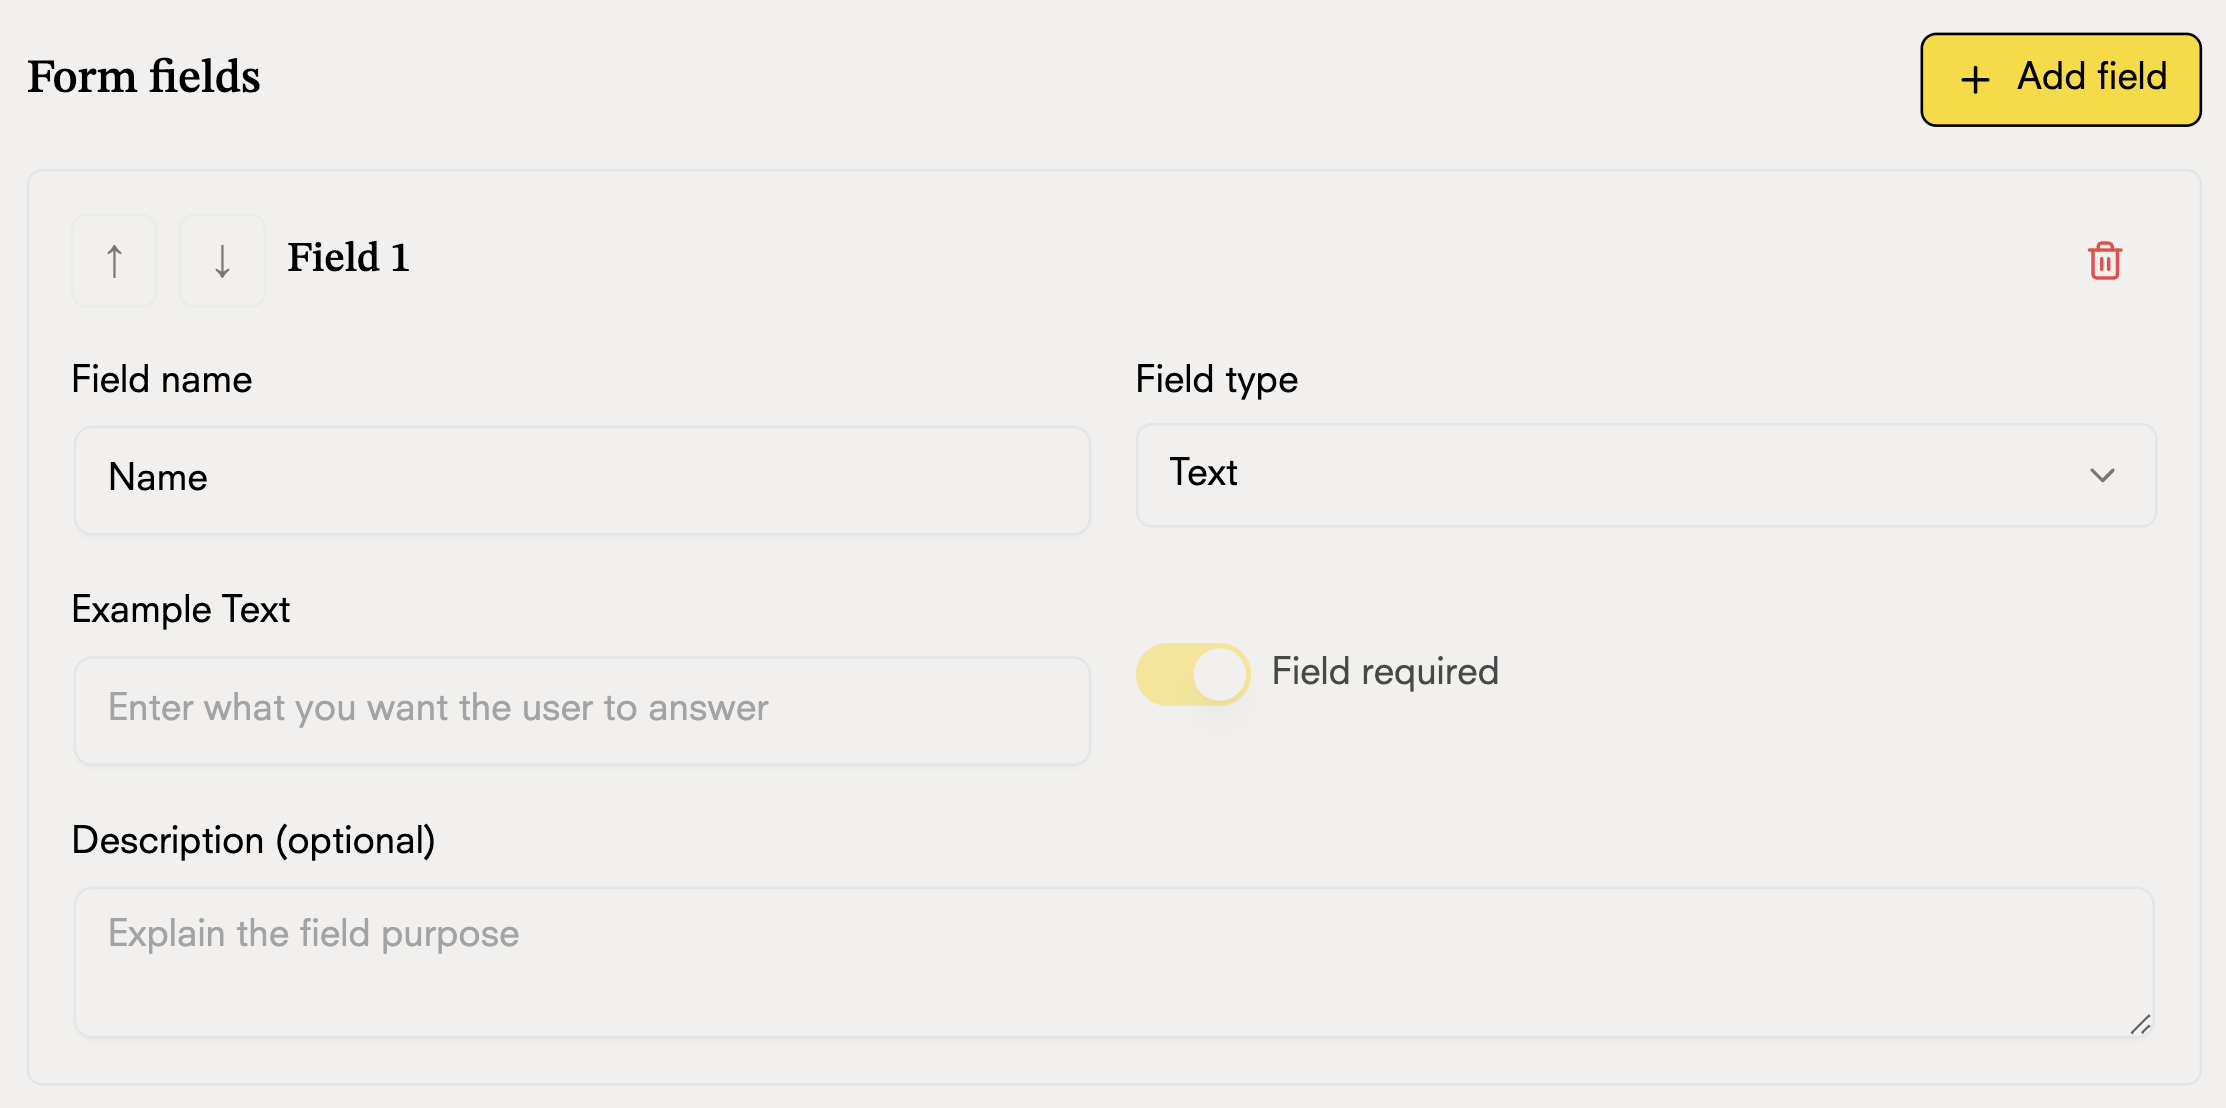
Custom Form
With this tool, you can customize the information you want to get from your client.
Configure Your Questionnaire
Set the Questionnaire Title
Provide the relevant information for the questionnaire so the chatbot knows when to activate.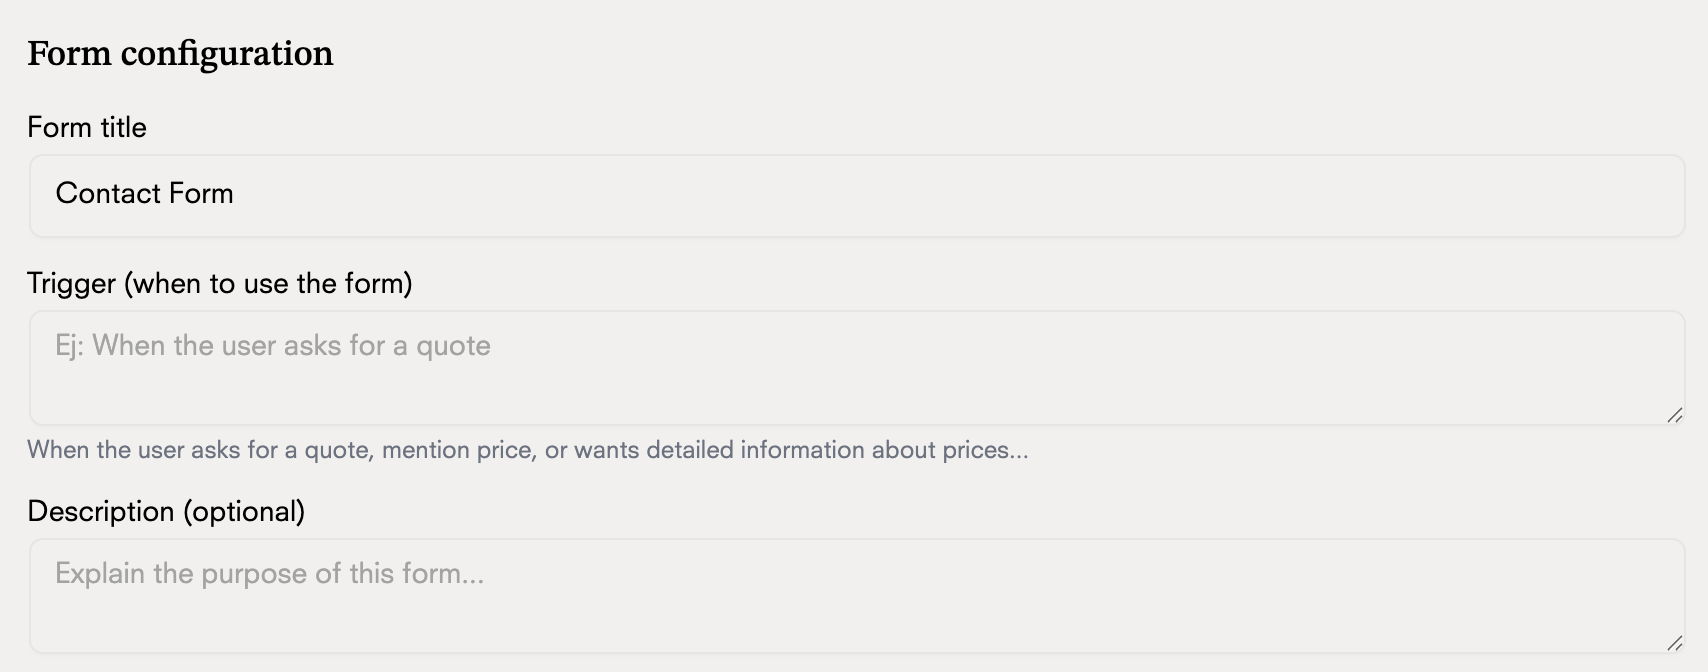
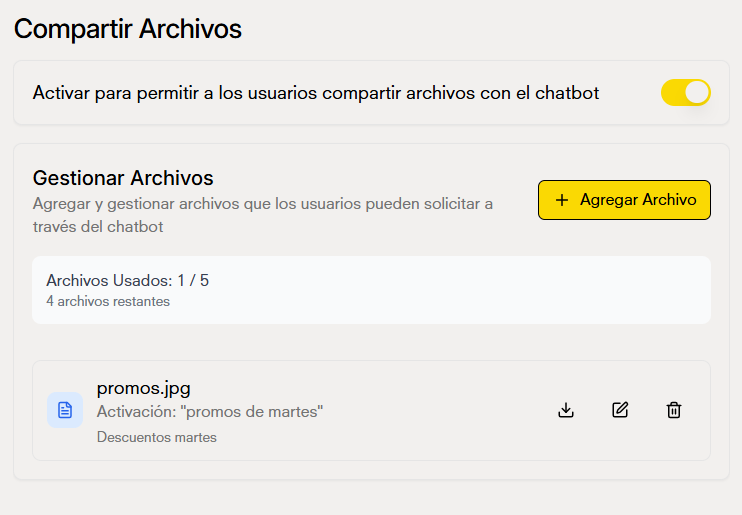
Share Files
The file sharing tool allows you as an administrator to provide files to your users automatically during conversations with the chatbot.Main Features
- Share files with users: Configure files (images or PDFs) that the chatbot will automatically provide when a specific situation is triggered during the conversation.
- File upload by users: Users can upload files directly to the chatbot when this functionality is enabled.
- Management from dashboard: You have the option to upload files manually from the dashboard, allowing the chatbot to send additional information to users when necessary.
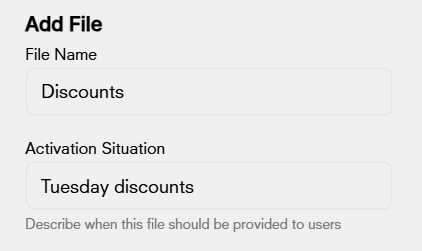
Configure File to Share
To configure a file that the chatbot will provide to users, you need to complete the following form:- File Name: Enter the name with which the file will be identified and sent to users.
- Activation Situation: Describe when this file should be provided to users. For example, “when the user asks for the catalog” or “when they request contact information”. This description helps the chatbot recognize when to share the file.
- Description (optional): Provide an optional description of what the file contains.
- Upload File: Select the file you want to share. You can upload images or PDF files with a maximum size of 10MB.
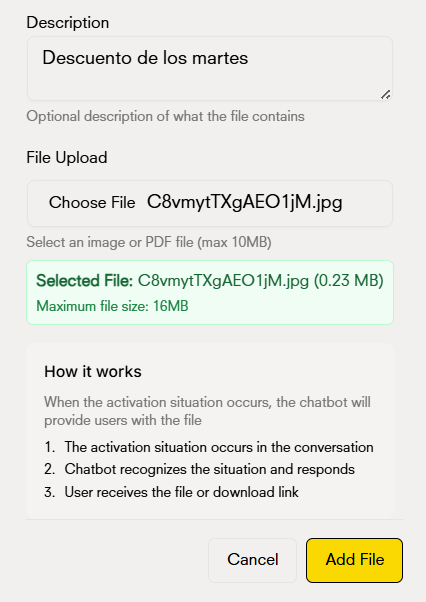
How It Works
When you configure a file to share, the process works as follows:- The activation situation occurs in the conversation: The user mentions or asks something that matches the activation situation you configured.
- The chatbot recognizes the situation and responds: The chatbot identifies that it should provide the file based on the configured activation situation.
- The user receives the file or download link: The chatbot automatically provides the file to the user, either as an attachment or as a download link, depending on the integration platform.
Custom Tool (API)
With this tool you can enable your bot to use any API endpoint as you want.
Set your tool
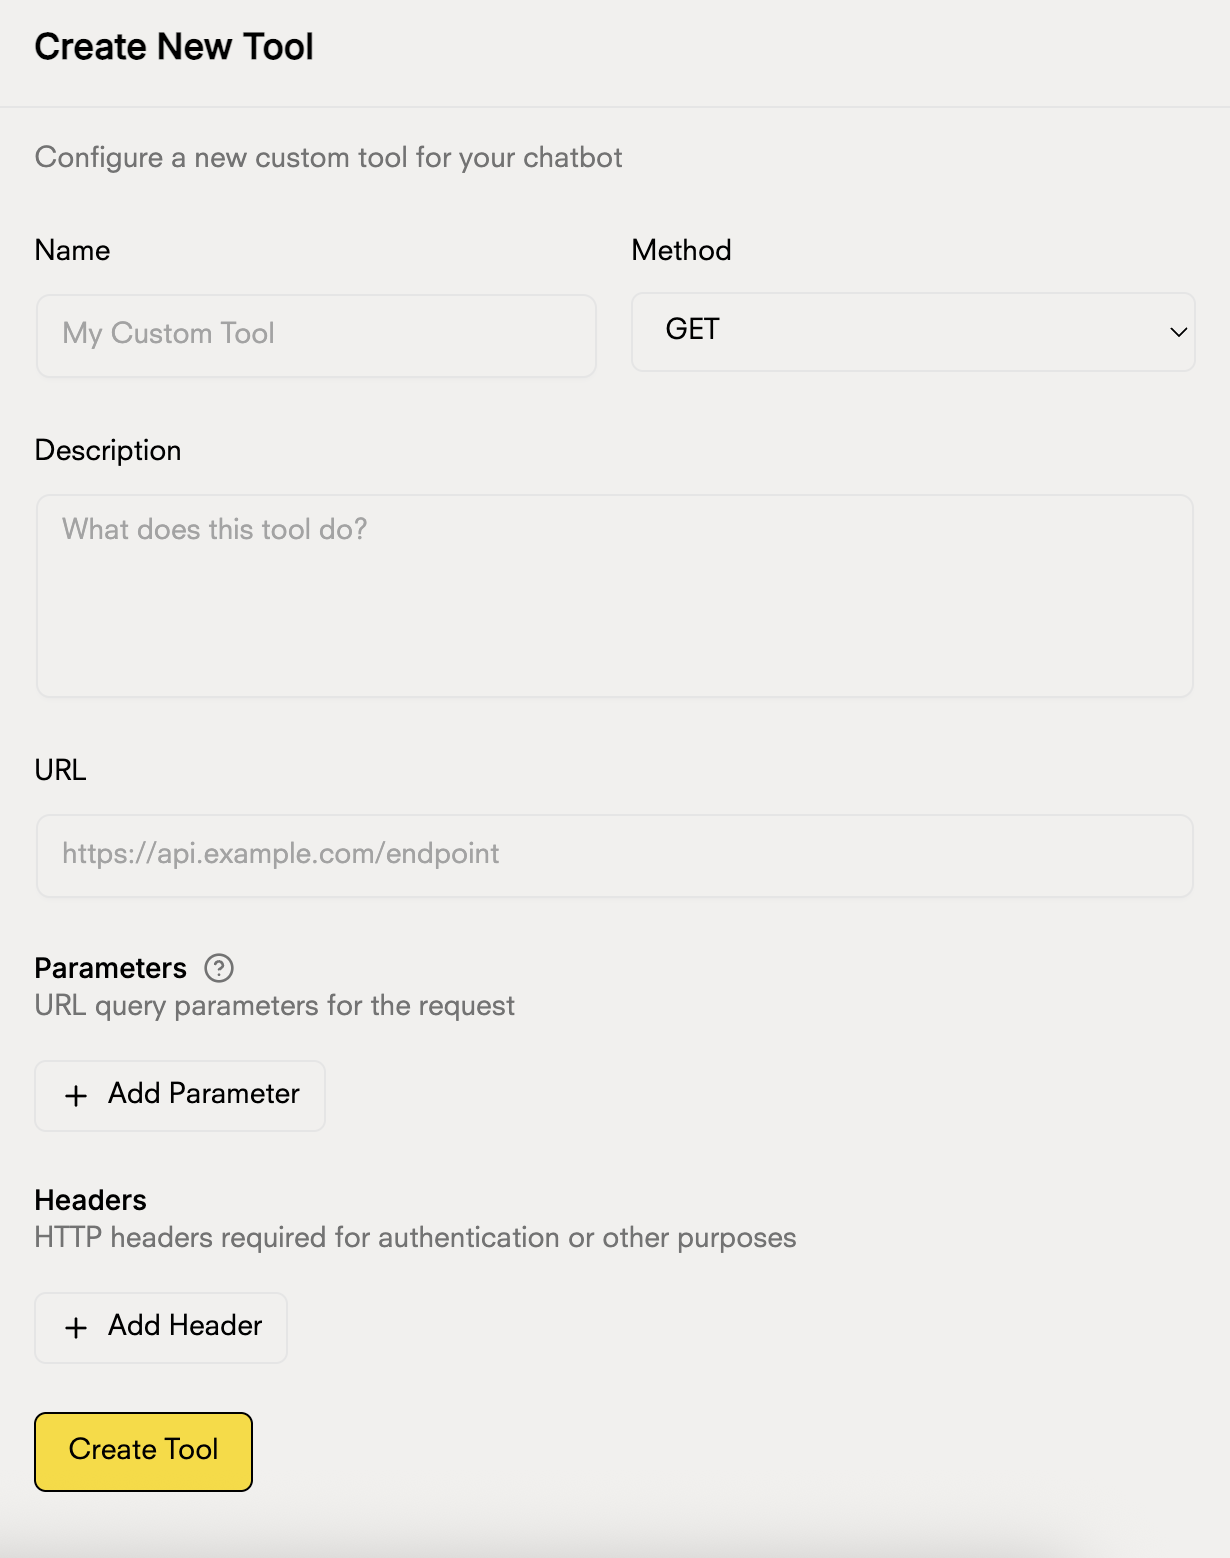
Configure Basic Information
Complete the main fields of your tool:
- Name: Give your tool a descriptive name
- Method: Select the HTTP method (GET, POST, PUT, DELETE)
- Description: Explain what this tool does so the chatbot knows when to use it
- URL: Enter the URL of your API endpoint
Configure Body (for POST, PUT, DELETE)
If you selected POST, PUT, or DELETE, you can configure the fields of the request body:For each body field, you can configure:
- Name: The name of the field (e.g., userData, user_data, items)
- Type: The data type (String, Number, Boolean, etc.)
- Is an Array: Check this option if the field should be an array
- Description: Explain what information this field contains
- Simple field:
name(String) - To send a username - Array field:
products(String, Is an array ✓) - To send a list of products - Numeric field:
quantity(Number) - To send quantities - Boolean field:
active(Boolean) - To indicate if a user is active - Object field:
address(Object) - To send a user’s full address
The body is only necessary for POST, PUT, and DELETE methods. GET does not use a body.
Add Parameters (Optional)
If your API requires query parameters, click “Add Parameter” and configure:
- Parameter name
- Data type
- Whether it is required or optional
Parameters are sent as query strings in the URL
Configure Headers (Optional)
For APIs that require authentication or specific headers, click “Add Header”:
- Header name (e.g., Authorization, Content-Type)
- Header value (e.g., Bearer token, application/json)
Usage Examples
Weather API
Weather API
Name: Weather Query
Method: GET
URL:
Parameters:
Method: GET
URL:
https://api.openweathermap.org/data/2.5/weatherParameters:
q(city)appid(your API key)units(metric)
Inventory API
Inventory API
Name: Stock Query
Method: GET
URL:
Headers:
Method: GET
URL:
https://your-api.com/inventory/checkHeaders:
Authorization:Bearer your-tokenContent-Type:application/json