What are Doko campaigns?
Campaigns allow you to create and send promotional messages to specific groups of contacts using WhatsApp. With campaigns you can:- Segment your audience: Choose specific contact lists for each campaign
- Personalize messages: Use templates with dynamic parameters to make each message unique
- Schedule sends: Decide when to send your messages, either immediately or at a future date
- Track results: View all your campaigns from your dashboard
Prerequisites
Before creating your first campaign, make sure you have:- Contact lists created: You need at least one contact list to send the campaign
- Active WhatsApp integration: You must have the WhatsApp Business integration configured and active
- Meta-approved templates: Message templates must be pre-approved by Meta for use
Create a campaign step by step
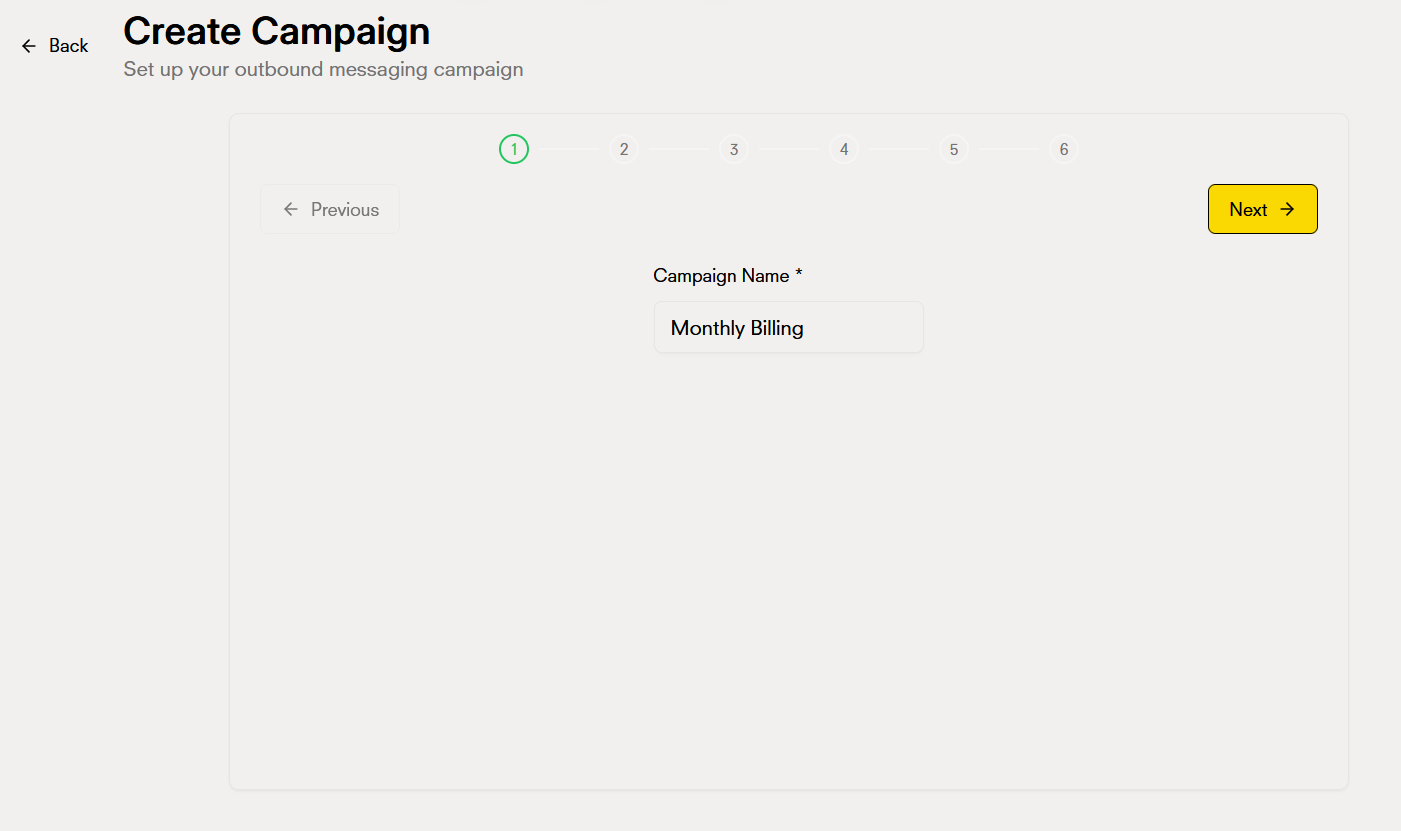
Follow these steps to create your first marketing campaign:1. Campaign name
The first thing is to give your campaign a descriptive name. This name will help you identify it easily in your dashboard.
2. Select contact list
Choose the contact list you want to target with your campaign. Only contacts from the selected list will receive the messages.

You can see information about the selected list:
- Total number of contacts
- List creation date
- Last update
3. Verify WhatsApp integration
The system will automatically verify if you have an active WhatsApp integration. If it’s not active, you’ll see a warning and won’t be able to continue.
4. Select WhatsApp template
Once the integration is verified, you’ll be able to select a Meta pre-approved message template. You’ll only see templates that are approved and available.
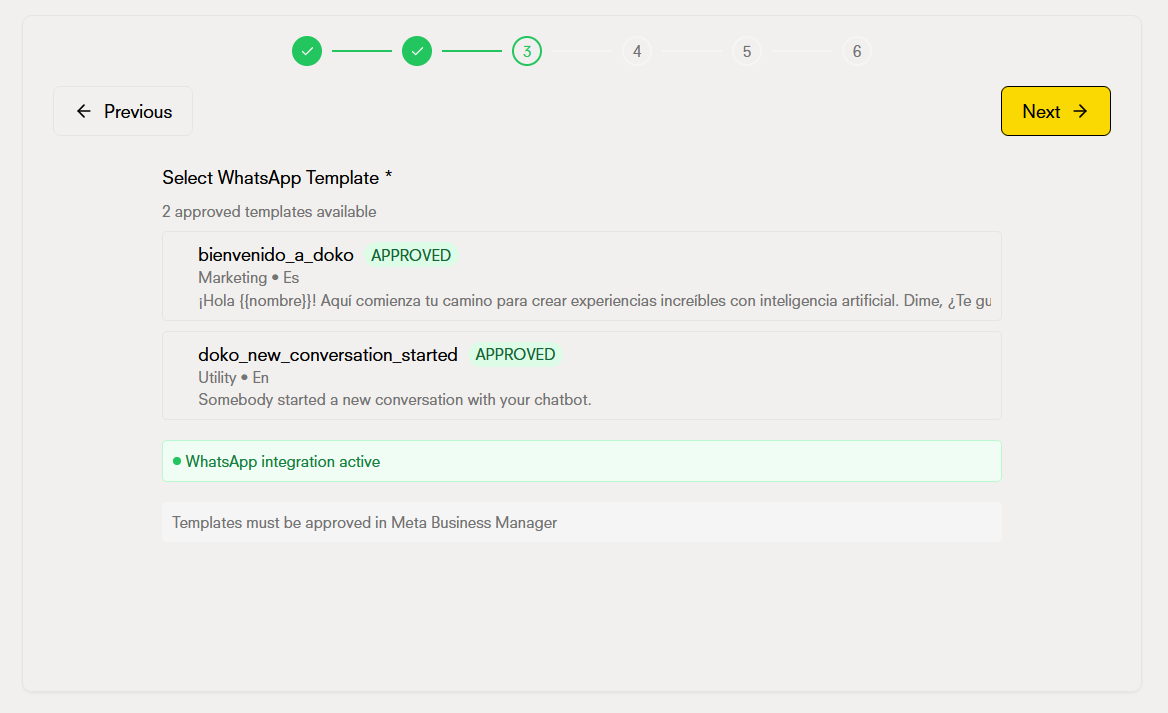
Each template shows:
- Template name
- Approval status (approved by Meta)
- Message preview
- Available parameters
5. Configure template parameters
If your template includes dynamic parameters like or , you’ll need to configure them in this section.
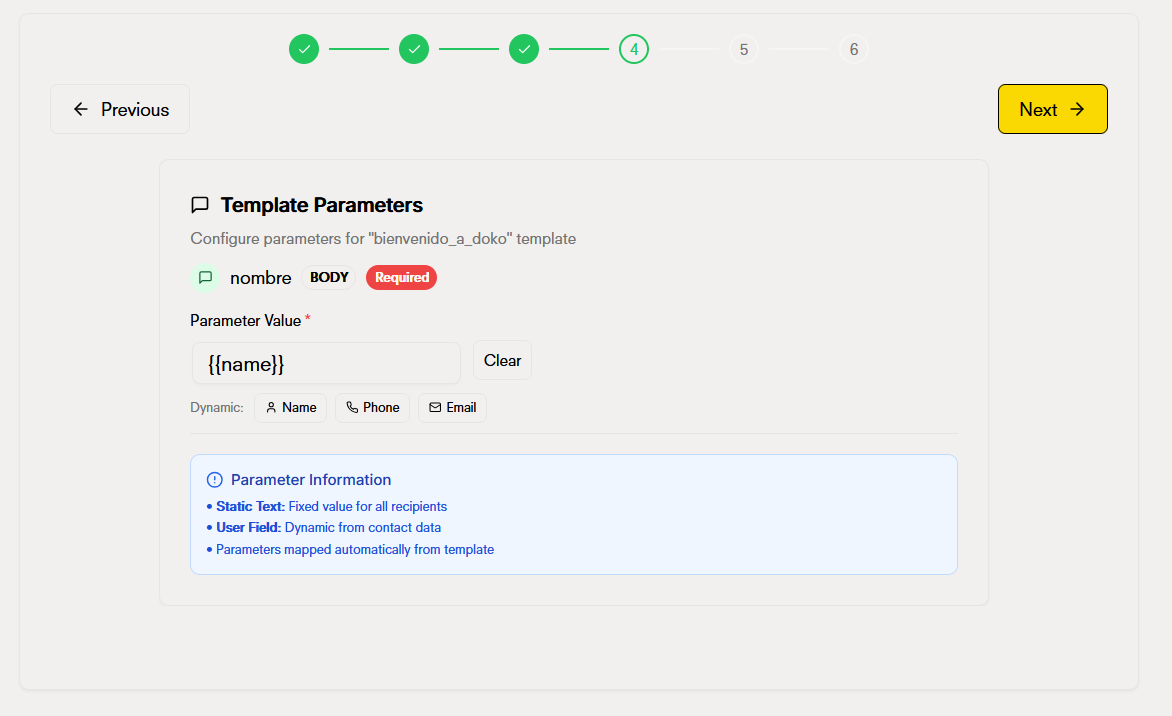
Common parameters include:
- : Will be replaced with the contact’s name
- : Will be replaced with the contact’s phone number
- : Will be replaced with the contact’s email
- Custom parameters according to your template
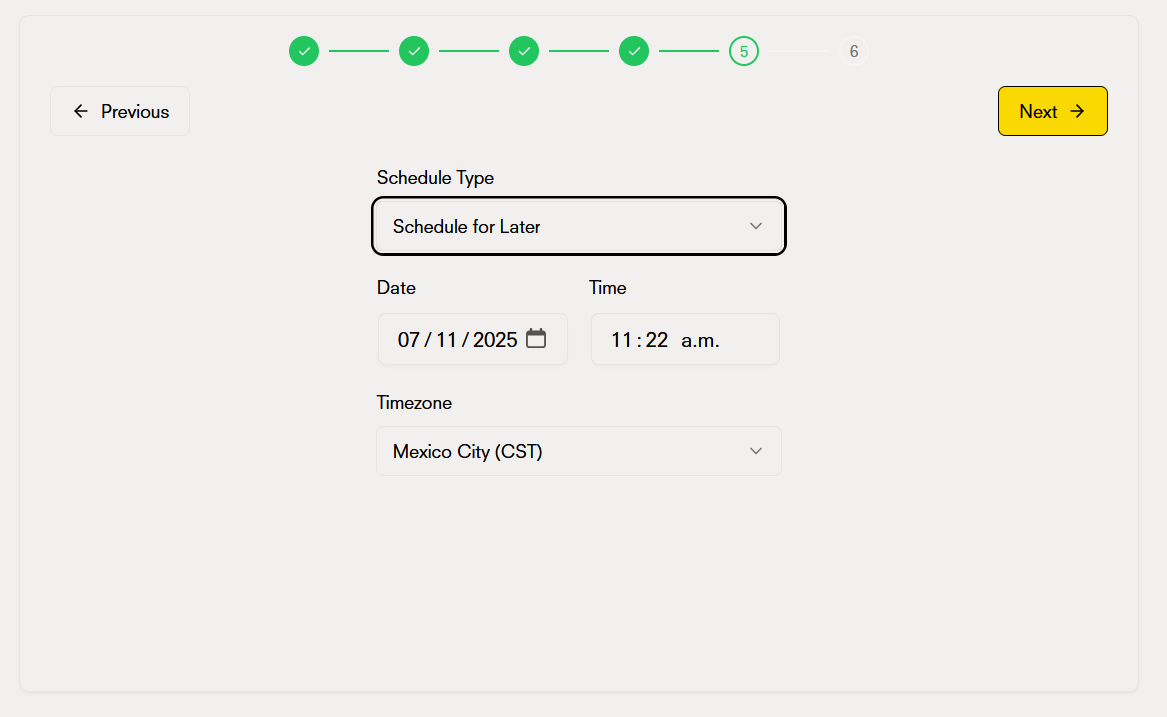
6. Schedule the send
Choose when you want the campaign messages to be sent:
Option 1: Immediate send
Messages will be sent as soon as you create and confirm the campaign.
Option 2: Scheduled send
Schedule the exact date and time you want the messages to be sent. You can choose:
- Send date
- Send time (consider your contacts’ time zone)
7. Review campaign summary
Before confirming, review the complete summary of your campaign:
The summary includes:
- Campaign name: The name you gave it
- Contact list: The selected list and number of contacts
- Template: The WhatsApp template that will be used
- Configured parameters: The values that will be used for the parameters
- Schedule: Send date and time (or “Immediate”)

8. Confirm and create the campaign
Once you’ve reviewed the summary, confirm the campaign creation.
Manage campaigns from the dashboard
Once created, all your campaigns will appear in the Campaigns section of your dashboard. From there you can: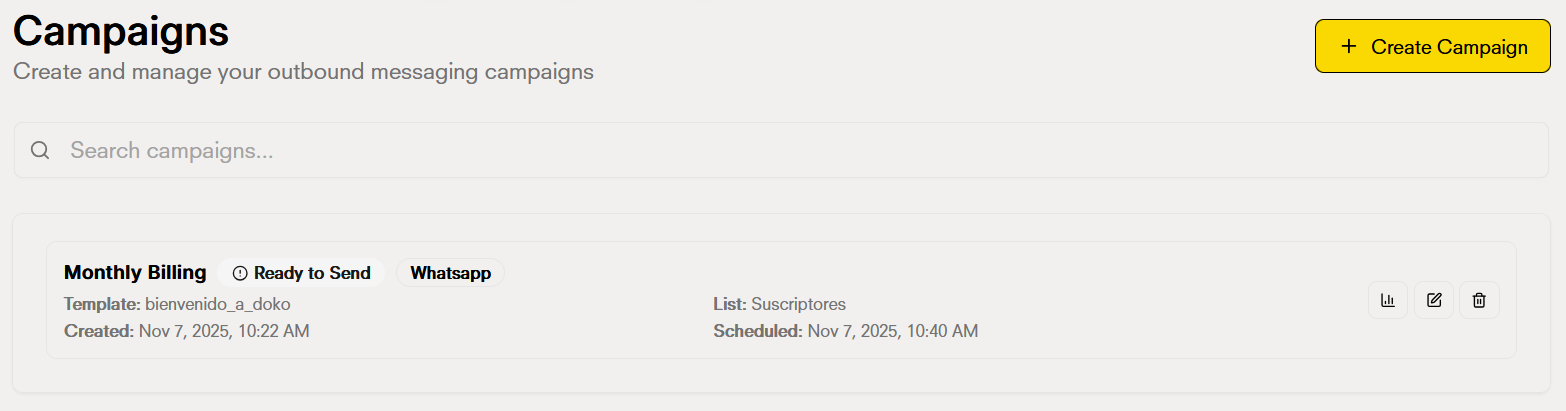
View all your campaigns
View campaign details
Filter and search
Campaign states
Campaigns can have different states:| State | Description |
|---|---|
| Scheduled | The campaign is created and waiting for the scheduled date/time |
| Sending | Messages are currently being sent |
| Completed | All messages were sent successfully |
| Paused | The campaign was manually paused |
| Error | There was a problem during sending (check details for more information) |
FAQ
FAQ